 |
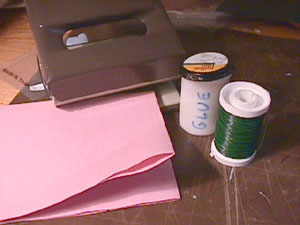
Tarvitset paperia, rei'ittimen, liimaa (esim. Eri Keeper)
ja rautalankaa, sekä maalarin- tai kukkateippiä (puuttuu kuvasta) lehtiin.
You need paper, a paper punch, paper or wood glue and florist's (or plain) wire. Plus some masking or florist's tape (not in the picture) for the leaves. |
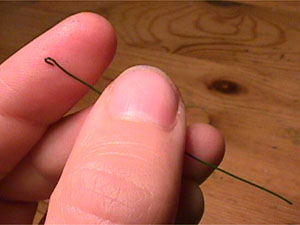 |
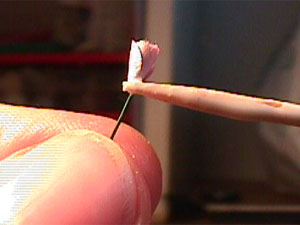
Taivuta varren päähän pieni lenkki.
Bend the end of the stem back to form a thin loop. |
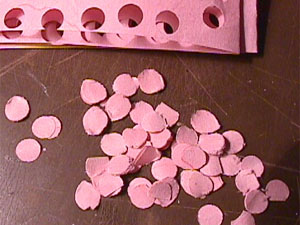 |
Leikkaa terälehdet paperista rei'ittimellä.
Punch out the petals. |
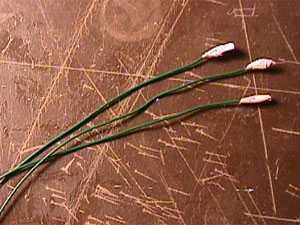 |
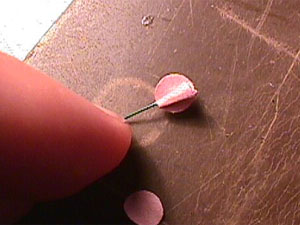
Liimaa yksi terälehti varren lenkin ympärille. Muusaa se
niin tiukaksi paperimassaksi, ettei kukka varmasti irtoa.
Glue one petal around the loop; crush it together with glue so that the flower won't fall off. |
 |
Annostele liimaa kukinnon pohjukkaan
cocktail-tikulla.
Use a coctail pick to spread glue at the bottom of the flower. |
 |
Joskus on helpompaa liimata kukka terälehteen kuin
päinvastoin...!
Sometimes it is easier to glue the flower on the petal than doing the other way around...! |
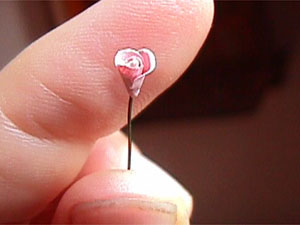 |
Terälehdet lisätään limittäin yksi kerrallaan.
Add the petals overlapping each other, one at a time. |
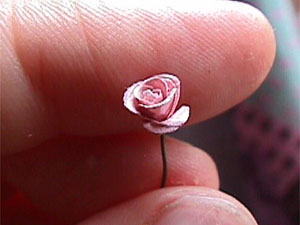 |
Uloimpia terälehtiä voi jo liimatessa hieman rutata ja
niiden reunoja taivuttaa, jotta ruususta tulee aukinaisen oloinen.
Valmis!
When glueing the outer petals you can crush them a little to make the rose open nicely. Here it is! |
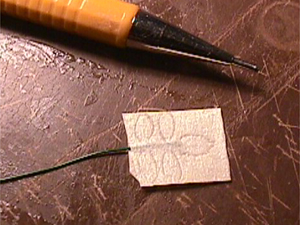 |
Maalarinteippi kaksinkerroin lehtivarren ympärille ja ääriviivat...
Fold the masking tape over the stem of the leaves and trace the leaves... |
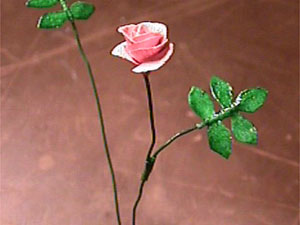 |
...ja kiinnitys kukan varteen esim. teipillä. Voit myös
jättää lehtien varren pitkäksi ja kieputtaa varsien alaosat yhteen, jos
haluat tukevamman ratkaisun - tai jos omistat kolvin, juottaa varret toisiinsa.
...and attach the stem of the leaves to the flower stem with masking tape. You can also twist the stems together, or solder them if you have the necessary tools. |